Singer Manual Sewing Machines: A Comprehensive Overview (Updated 02/27/2026)
Since 1851, Singer has been synonymous with sewing, beginning with Isaac Singer’s first practical sewing machine patent. These durable machines, like the Heavy Duty 4452, offer both power and style.
Historical Development of Singer Sewing Machines
The story of Singer sewing machines begins with a critical analysis of existing designs, specifically the flaws inherent in the Lerow and Blodgett machine. Isaac Singer, recognizing limitations in their circular shuttle movement, envisioned a streamlined, straight-line shuttle path. This innovation, coupled with his idea to replace the curved needle with a vertically moving, straight one, formed the core of his revolutionary design.
In 1851, Isaac Singer secured his first patent for a practical sewing machine, officially marking the birth of the Singer company. This wasn’t merely an incremental improvement; it was a foundational moment in sewing technology. Early Singer machines quickly gained prominence, establishing the “SINGER” name as synonymous with sewing itself. The company’s growth was rapid, fueled by continuous innovation and a commitment to producing reliable, user-friendly machines.
Interestingly, Singer also manufactured machines under other brands, such as Wheeler & Wilson, demonstrating a complex history of acquisition and adaptation. Models like the Wheeler & Wilson D9, produced in Bridgeport after 1905, were later modified to incorporate Singer fittings, showcasing the company’s evolving engineering practices and commitment to standardization.
The Innovations of Isaac Singer
Isaac Singer’s genius wasn’t simply inventing a sewing machine; it was fundamentally rethinking the mechanics of the process. His key innovation lay in addressing the inefficiencies of earlier models, notably the Lerow and Blodgett machine. Singer’s insight to employ a straight-line shuttle movement, contrasting with the circular path of its predecessors, dramatically improved speed and reliability.
Furthermore, Singer’s vision extended to the needle itself. He recognized the advantages of a vertically moving, straight needle over the curved, horizontal designs then in use. This seemingly simple change significantly enhanced precision and control, making sewing easier and more accurate. These weren’t isolated improvements; they were interconnected elements of a cohesive system designed for optimal performance.
Singer’s initial patent model, submitted as a commercial sewing machine, wasn’t just a prototype; it was a statement of intent – a commitment to bringing efficient sewing technology to a wider audience. His focus on practicality and usability laid the groundwork for Singer’s enduring success and cemented his legacy as a pivotal figure in the industrial revolution.
Early Singer Models (Pre-1900)
The period before 1900 witnessed a rapid evolution in Singer sewing machine design, establishing the company’s reputation for quality and innovation. Following Isaac Singer’s 1851 patent, early models focused on refining the core mechanics – the straight-needle and shuttle system – to enhance reliability and ease of use. Mass production began to take hold, making sewing machines increasingly accessible to households.
A notable example is the Wheeler & Wilson D9, later produced by Singer in Bridgeport after 1905. This machine, characterized by its distinctive square pillar, was eventually modified to accept Singer fittings, becoming the 9W7 and remaining in production until 1913. This demonstrates Singer’s adaptability and willingness to incorporate successful designs from competitors.
Introduced in 1865, another mass-produced model remained in production for decades, highlighting the durability and enduring appeal of early Singer designs. These machines weren’t merely functional tools; they represented a significant shift in textile production, empowering individuals and transforming the garment industry.
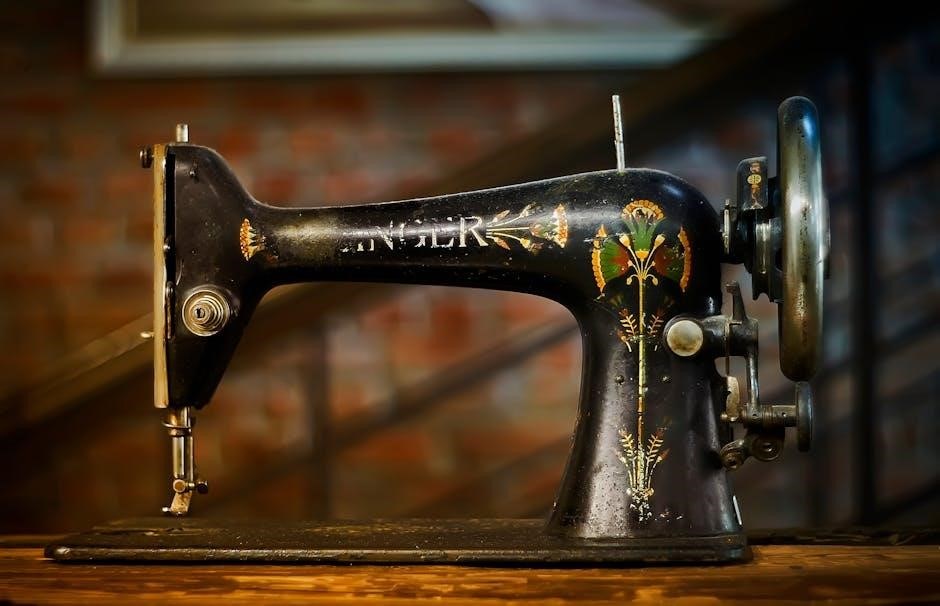
The Singer Model 66: A Durable Workhorse
The Singer Model 66, renowned for its robust construction and unwavering reliability, quickly became a favorite among both domestic users and industrial workshops. Introduced with a focus on heavy-duty performance, this machine was designed to handle a wide range of fabrics and sewing tasks, from delicate dressmaking to sturdy upholstery work.
Its cast iron body provided exceptional stability, minimizing vibrations even at higher sewing speeds. The Model 66’s straightforward mechanics, while manual, were remarkably efficient, allowing for precise stitch control and consistent results. This simplicity also contributed to its longevity, making it relatively easy to maintain and repair.
Many Singer Model 66 machines remain in operation today, a testament to their exceptional build quality and enduring design. Collectors and sewing enthusiasts highly prize these machines, recognizing their historical significance and practical value. The Model 66 truly earned its reputation as a durable workhorse, capable of withstanding decades of continuous use.
Singer Featherweight Models: Portability and Precision
Singer Featherweight sewing machines, particularly the 221 and 222K models, represent a pinnacle of portable sewing technology. Introduced in the early 20th century, these lightweight machines were designed for convenience without sacrificing sewing quality. Their compact size and relatively low weight made them ideal for travel, classes, and small spaces – a revolutionary concept at the time.
Despite their portability, Featherweights delivered remarkably precise and consistent stitches. The internal mechanisms, though smaller in scale, were engineered with the same attention to detail as their larger counterparts. This allowed users to tackle a diverse range of sewing projects, from garment construction to quilting and crafting.
The enduring popularity of Singer Featherweights is evident in their continued demand among collectors and sewing enthusiasts. Their robust construction and timeless design ensure they remain functional and aesthetically pleasing for generations. These machines embody a perfect blend of portability, precision, and enduring quality.
Singer 201 & 201-2: Popular Domestic Machines
The Singer 201 and its slightly modified successor, the 201-2, became incredibly popular domestic sewing machines, particularly during the mid-20th century. These models were renowned for their reliability, ease of use, and ability to handle a wide variety of fabrics. They represented a significant step forward in home sewing accessibility, empowering countless individuals to create and repair their own garments.
Featuring a free-arm design, the 201 and 201-2 facilitated easier sewing of cuffs, collars, and other cylindrical shapes. The machines also incorporated a range of stitch options, allowing for both straight and zigzag stitching, enhancing their versatility. Their robust construction ensured longevity, with many units still in operation today.
The Singer 201 and 201-2’s enduring appeal stems from their combination of practicality, durability, and user-friendliness. They remain highly sought after by vintage sewing machine collectors and those seeking a dependable, classic machine for everyday sewing tasks.
Understanding Singer Shuttle Types
A crucial aspect of Singer manual sewing machines lies in understanding their shuttle systems. Early Singer machines, diverging from the Lerow and Blodgett design, utilized a shuttle that moved in a straight line – a significant innovation. This contrasted with the circular motion of previous shuttles, improving efficiency and reducing wear.
Over time, Singer employed different shuttle types, primarily the oscillating and rotary hook systems. The oscillating shuttle, common in many vintage models, features a bobbin that swings back and forth, creating the interlocking stitch. These are known for their quiet operation and ability to handle various thread weights.
Later models, and some contemporary machines, adopted the rotary hook. This system uses a rotating hook to catch the thread, resulting in a faster and smoother stitch formation. Understanding which shuttle type your Singer machine utilizes is vital for proper maintenance, threading, and troubleshooting. Correct bobbin insertion and winding are also key to optimal performance, regardless of the shuttle type.
Rotary Hook vs. Oscillating Hook
Singer manual sewing machines showcase two primary hook types: the rotary hook and the oscillating hook; The oscillating hook, prevalent in earlier models, employs a swinging motion of the bobbin to interlock the threads, creating the stitch. This system is generally quieter and adaptable to a wider range of thread thicknesses, making it suitable for diverse fabrics.
Conversely, the rotary hook, found in many later and modern Singer machines, utilizes a rotating motion to catch the thread and form the stitch. This design allows for significantly higher sewing speeds and a smoother, more consistent stitch quality. However, rotary hooks can sometimes be more sensitive to thread type and tension adjustments.
The choice between these systems impacts machine performance. Oscillating hooks prioritize versatility and quietness, while rotary hooks emphasize speed and stitch consistency. Recognizing your machine’s hook type is essential for correct bobbin winding, threading, and troubleshooting any potential stitching issues. Each system requires specific maintenance practices to ensure longevity and optimal function.
Singer Manual Machine Mechanisms
Singer manual sewing machines, despite their variety, share core mechanical principles. A handwheel, directly driven by the operator, powers the entire system. This rotation initiates a complex interplay of components, including the needle bar, presser foot, feed dogs, and the hook mechanism – either rotary or oscillating – discussed previously.
The vertically moving needle, a key innovation by Singer, pierces the fabric, creating a loop on the underside. Simultaneously, the feed dogs, toothed metal bars, advance the fabric incrementally with each stitch. The hook then catches this loop, interlocks it with the bobbin thread, and forms a secure stitch.
Tension discs regulate thread flow, ensuring balanced stitch formation. The presser foot maintains consistent fabric pressure against the feed dogs. These mechanisms, though manually operated, are engineered for precision and durability. Understanding this interplay is crucial for effective operation, maintenance, and troubleshooting of these classic machines, allowing for years of reliable service.
Needle Systems and Compatibility
Singer sewing machines historically utilized several needle systems, demanding careful attention to compatibility. Early Singer models, pre-1900, often employed the “L” needle system, characterized by a long shank and flat side. Later, Singer transitioned to the “15×1” system, a widely adopted standard featuring a shorter shank and a rounded side.
The “130/705H” needle system became prevalent in many subsequent Singer models, including the popular 201 and 201-2. These systems aren’t universally interchangeable; using the wrong needle can damage the machine or result in poor stitch quality. Always consult your machine’s manual or a reliable reference guide to determine the correct needle type.
Modern Singer machines may utilize universal needles compatible with multiple systems. However, for vintage machines, adhering to the original needle specification is paramount. Needle size also matters, correlating to fabric weight; finer fabrics require smaller needles, while heavier materials necessitate larger ones. Proper needle selection ensures optimal performance and longevity.
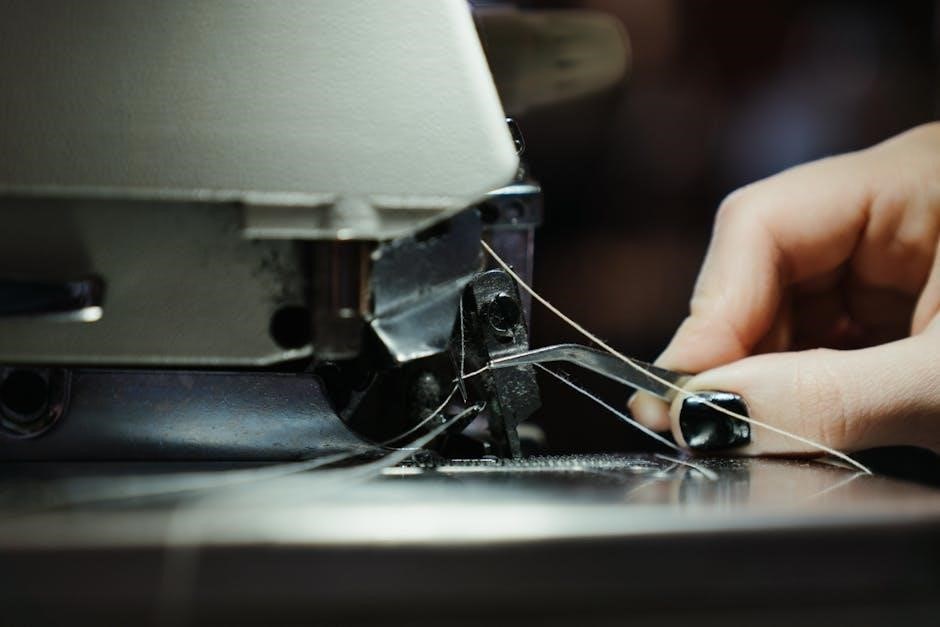
Threading a Singer Manual Machine
Threading a Singer manual machine, while seemingly simple, requires precision for optimal performance. Begin by ensuring the presser foot is raised, releasing tension on the thread path. Guide the thread from the spool pin, through the first thread guide, and then down and around the tension discs – crucial for stitch quality.
Next, lead the thread through the take-up lever, ensuring it’s fully seated within the lever’s notch. Continue threading through the remaining guides, directing it towards the needle clamp. Thread the needle from front to back, using needle threaders if needed. Simultaneously, wind the bobbin correctly.
Finally, draw up the bobbin thread by holding the needle thread gently and turning the handwheel towards you. This interlocks the upper and lower threads. Incorrect threading leads to skipped stitches or tangled thread. Refer to your machine’s manual for specific diagrams and instructions, as threading paths can vary slightly between models.
Bobbin Winding Techniques
Proper bobbin winding is essential for consistent sewing with a Singer manual machine. Begin by placing the spool of thread on the spool pin and guiding the thread through the designated bobbin winding tension disc. This ensures even distribution of thread onto the bobbin.
Next, attach the bobbin to the bobbin winder spindle, ensuring it clicks securely into place. Engage the bobbin winder by sliding the lever or knob into the winding position. Gently depress the foot pedal to start the winding process. Monitor the bobbin as it fills, stopping before it overflows to prevent thread jams.
Once full, the bobbin winder should automatically disengage. Cut the thread and remove the bobbin. Always test the wound bobbin by drawing up a length of thread to ensure it unwinds smoothly. Incorrect winding tension can cause uneven stitches or machine malfunction. Consistent practice yields perfectly wound bobbins.
Common Problems and Troubleshooting
Singer manual machines, while durable, can encounter issues. A frequent problem is thread breakage, often caused by incorrect threading, a dull needle, or improper tension; Always re-thread the machine carefully, replacing the needle if necessary. Tension adjustments are crucial; too tight causes breakage, too loose creates looping.
Another common issue is skipped stitches. This can stem from an incorrectly inserted needle, a bent needle, or a timing problem. Ensure the needle is fully inserted and straight. If problems persist, professional servicing may be required.
Bobbin issues, like thread nests, often result from improper winding or incorrect bobbin insertion. Rewind the bobbin and verify correct placement. Finally, a machine that won’t turn smoothly usually indicates a need for lubrication. Regularly oiling key components prevents friction and ensures smooth operation. Consistent maintenance minimizes these problems.
Tension Adjustment on Singer Machines
Proper tension is vital for achieving balanced stitches on your Singer manual machine. Incorrect tension leads to frustrating issues like thread breakage, puckered seams, or looping. The upper tension dial controls the thread coming from the spool, while the bobbin tension, though less frequently adjusted, impacts the underside of the stitch.
To diagnose tension problems, start by testing on scrap fabric. If the top thread pulls the fabric down, decrease the upper tension. Conversely, if the bobbin thread pulls the fabric, increase the upper tension. Small adjustments are key – a slight turn of the dial can make a significant difference.
Remember to re-thread both the upper thread and bobbin after any tension adjustments. Always test after each change. For balanced tension, the top and bobbin threads should interlock evenly within the fabric layers. Consistent practice and careful observation will help you master tension control on your Singer machine.
Maintaining Your Singer Manual Machine
Regular maintenance is crucial for ensuring the longevity and optimal performance of your Singer manual sewing machine. Dust and lint buildup can impede moving parts, causing malfunctions and reducing stitch quality. Frequent cleaning, at least after every eight hours of use, is highly recommended.
Use a soft brush to remove lint from the bobbin area, feed dogs, and around the needle plate. A small vacuum cleaner attachment can also be helpful. Oil selection is important; use a sewing machine oil specifically designed for this purpose. Apply a few drops to key lubrication points – as indicated in your machine’s manual – including the bobbin winder, shuttle hook, and any visible moving parts.
Avoid over-oiling, as excess oil attracts dust. Periodically check and replace the needle, and ensure the machine is covered when not in use to protect it from dust and damage. Consistent care will keep your Singer running smoothly for years to come.
Oil Selection and Lubrication
Proper lubrication is paramount for the smooth operation and extended lifespan of your Singer manual sewing machine. Using the correct type of oil is essential; sewing machine oil specifically formulated for this purpose is the only acceptable choice. Avoid using general-purpose oils like WD-40, as they can gum up the delicate mechanisms.
Apply oil sparingly to key areas identified in your machine’s manual. These typically include the bobbin winder, shuttle hook (or rotary hook), and any visible moving parts like linkages and bearings. A few drops are usually sufficient – over-oiling attracts dust and lint, creating more problems than it solves.
Regular oiling frequency depends on usage. For frequent sewers, oiling after every few hours of operation is advisable. For occasional use, monthly lubrication may suffice. Always wipe away any excess oil with a clean, lint-free cloth to prevent buildup and ensure optimal performance; Consistent, careful lubrication is a small investment that yields significant returns in machine longevity.
Singer Machine Accessories
Enhance the versatility of your Singer manual sewing machine with a range of readily available accessories. Presser feet are arguably the most impactful addition, allowing you to tackle diverse fabrics and techniques. Options include zigzag feet, buttonhole feet, rolled hem feet, and even quilting feet, each designed for a specific purpose.
Bobbins are essential consumables, and having a supply of the correct type for your machine is crucial. Singer machines often require specific bobbin classes, so ensure compatibility. Needles are equally important; selecting the right needle size and type (universal, ballpoint, denim) for your fabric will dramatically improve stitch quality.
Other useful accessories include seam rippers, thread guides, and lint brushes for maintenance. Singer offers accessory kits tailored to various sewing needs, providing a convenient way to expand your machine’s capabilities. Exploring these options unlocks a wider range of creative possibilities and ensures your Singer machine remains a valuable tool for years to come.
Presser Feet for Different Fabrics
Presser feet are vital for achieving optimal results when sewing various fabrics with your Singer manual machine. A zigzag foot is incredibly versatile, handling both straight and zigzag stitches effectively, making it ideal for general sewing and stretch fabrics. For delicate materials like silk or chiffon, a roller foot allows the fabric to glide smoothly, preventing puckering.
When working with knits, a ballpoint needle and presser foot combination is essential; the rounded point prevents skipped stitches. Buttonholes become effortless with a dedicated buttonhole foot, ensuring consistent and professional-looking results. Heavier fabrics like denim or canvas benefit from a heavy-duty presser foot, providing increased pressure for even feeding.
For specialized techniques, consider a quilting foot for precise stitch-in-the-ditch quilting or a blind hem foot for invisible hems. Investing in a selection of presser feet significantly expands your Singer machine’s capabilities, allowing you to confidently tackle any sewing project, regardless of fabric type or complexity.
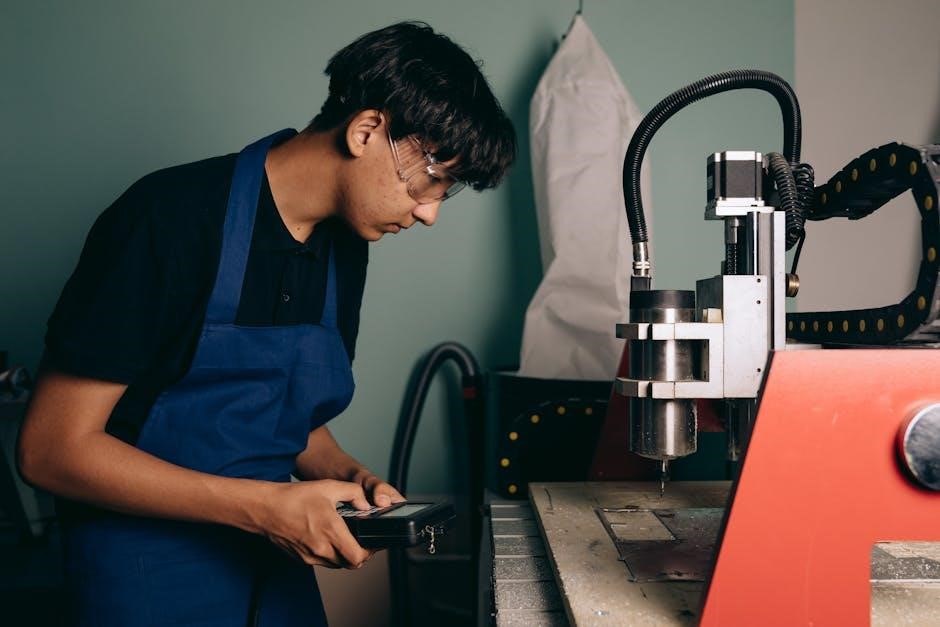
Finding Replacement Parts
Maintaining a Singer manual sewing machine often requires replacing worn or broken parts. Fortunately, a robust network exists for sourcing these components. Online marketplaces like eBay and specialized sewing machine parts retailers are excellent starting points, offering a vast selection of both new and vintage parts.
Singer’s official website may also carry some replacement parts, particularly for newer models. However, for older machines, dedicated vintage Singer parts suppliers are invaluable. These suppliers often specialize in specific eras or models, providing expert knowledge and hard-to-find items. When ordering, always have your machine’s serial number handy to ensure compatibility.
Local sewing machine repair shops can also source parts or offer guidance. Don’t hesitate to ask for assistance identifying the correct component. Before purchasing, carefully compare the part number and appearance to your original part. Investing in quality replacement parts will extend the life of your Singer machine and ensure continued reliable performance.
Dating Your Singer Sewing Machine
Determining the age of your Singer manual sewing machine can be a fascinating endeavor, offering insights into its history and potential value. The most reliable method involves locating the serial number, typically found on a plate affixed to the machine’s body. This number is your key to unlocking its manufacturing date.
Numerous online resources, including dedicated Singer serial number databases and enthusiast forums, allow you to input your machine’s serial number and receive an estimated production year. Be aware that these databases aren’t always exhaustive, and slight variations may occur. The serial number often reveals the factory location – Bridgeport, CT, or Clydebank, Scotland – adding another layer of detail.
Model numbers can also provide clues, as certain models were produced during specific timeframes. However, the serial number remains the most accurate dating tool. Understanding your machine’s age can inform maintenance practices and appreciation for its enduring legacy. Careful research will unveil the story behind your vintage Singer.
Resources for Singer Manual Machine Owners
Owning a Singer manual sewing machine connects you to a vibrant community and a wealth of support resources. Several online platforms cater specifically to Singer enthusiasts, offering troubleshooting advice, parts identification assistance, and historical information. Dedicated forums allow owners to share experiences, ask questions, and connect with fellow collectors.
Websites specializing in vintage sewing machines often host digitized manuals, parts diagrams, and repair guides. These resources are invaluable for understanding your machine’s mechanics and performing maintenance. Furthermore, many online retailers specialize in supplying replacement parts for vintage Singers, ensuring your machine remains operational for years to come.
YouTube channels dedicated to sewing machine repair provide visual demonstrations of common fixes and maintenance procedures. Local sewing machine repair shops can also offer expert assistance. Embracing these resources empowers you to maintain and enjoy your classic Singer machine, preserving its legacy for future generations.